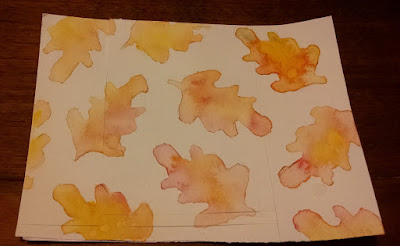
The first class had us using one of our dies to outline shapes in pencil for an all-over background. The teacher used a pear shape, which I don't have. I looked through my dies and found this leaf die, and drew my leaf shapes on Canson Cold press 140 lb Watercolor paper.
I painted one of the shapes with clear water, and dropped in several colors, and let the water blend them. I then moved on to the second leaf, and tried again, going from leaf to leaf.

The first one (upper right) didn't really look good to me. I had added drops of cadmium yellow mostly in the center, then a couple of drops of a green I had blended from cadmium yellow and ultramarine.
On the other side of the leaf I added drops of alizarin red. When I tilted the paper the red and yellow sort of formed an orange, but I didn't like the way it looked. When I added a little more water to the yellow, I think it had already dried a little and lines showed up. And I don't know how the yellow dot showed up.
The next one I did (right side, just under the first one) turned out better. There is just the one spot that seems to have a harsher line than I intended, but I can see the improvement.
The rest of them I rather like how they turned out. I used more water on the paper as I went along, and I see that the last couple are a little too pale and blended for my taste, probably because there was too much water to begin with.
To make my card I trimmed down the watercolor paper to 3 3/4 x 5 inches (which eliminated the leaf I didn't like), then matted it with a nice reddish brown. I tied a ribbon around it, and popped it up for a little dimension on my brown card base. I think it turned out pretty well.
The die I used was from Dare2B Artzy, and the paints were Windsor Newton Cotman watercolors (tube).
